Paper or nothing?

Not meaning bags, but whether to use cupcake liners (aka muffin papers).

I hate cleaning muffin pans, and I find it hard to get muffins out cleanly without liners.  My husband doesn’t like liners because they stick to the muffin.  Our compromise, dating back to our first year of marriage, was for me not to use liners and he gets to remove the muffins and wash the pans. Done.  (At this point I usually remove them myself, but I only rarely wash the pans).

But what about cupcakes?  It hasn’t come up often since he doesn’t like cupcakes–he’d rather have cake and I’m good with that–but what about for a shower?

I’m making cupcakes for a baby shower this weekend.  Chocolate with chocolate frosting.  My new favorite chocolate cake is fantastic but I’ve never made it as cupcakes.  Neither have I paired it with my favorite chocolate frosting; the cake calls for ganache but that is not practical for cupcakes.  I needed to make a test batch anyway so I have tested the following and will share the results here for your reference and viewing pleasure:

  • Cupcakes baked directly in greased pan (sprayed with Pam)
  • Cupcakes baked in paper liners
  • Cupcakes baked in paper lines that have also been sprayed (not at all inspired by overspray from the unlined cupcakes, of course)

Reasons to choose one method over another:

  • Aesthetics
  • Ease of cleanup
  • Ease of transport & handling
  • Minimizing waste
  • Hygiene
  • Ease of consumption
  • What bakes best
  • Taste, of course!

Obviously papers make cleanup easier, and you have less waste without them (unless the cupcakes stick terribly to the pan).  But how much is baking affected by the use of liners?  Direct thermal contact with the pan could reasonably be expected to make a difference, and it did:


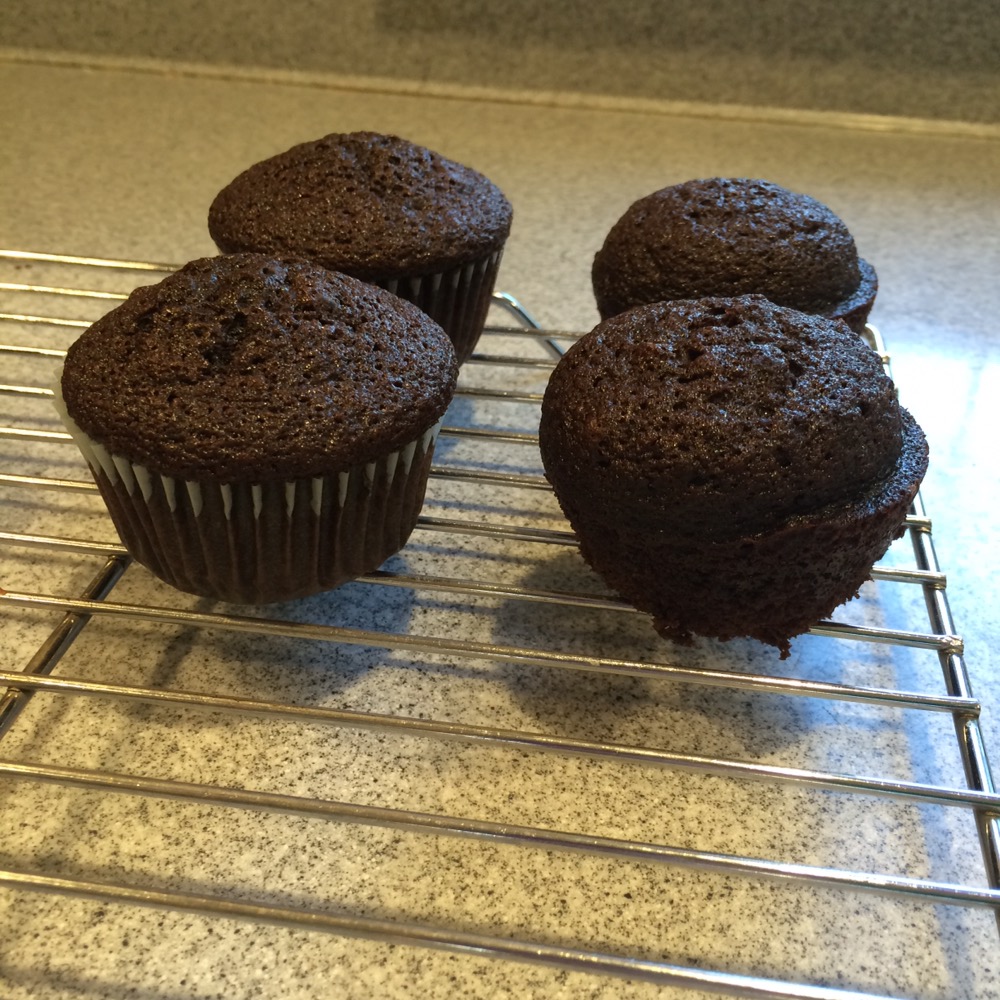
It’s similar to the difference between using wet cake strips around a metal cake layer vs not, except with an extreme little ridge on the side.  Without the liner, the sides bake quickly and the centers dome.  (I have not noticed this issue with most muffin recipes).

Spraying the liners vs not?

Not so much:


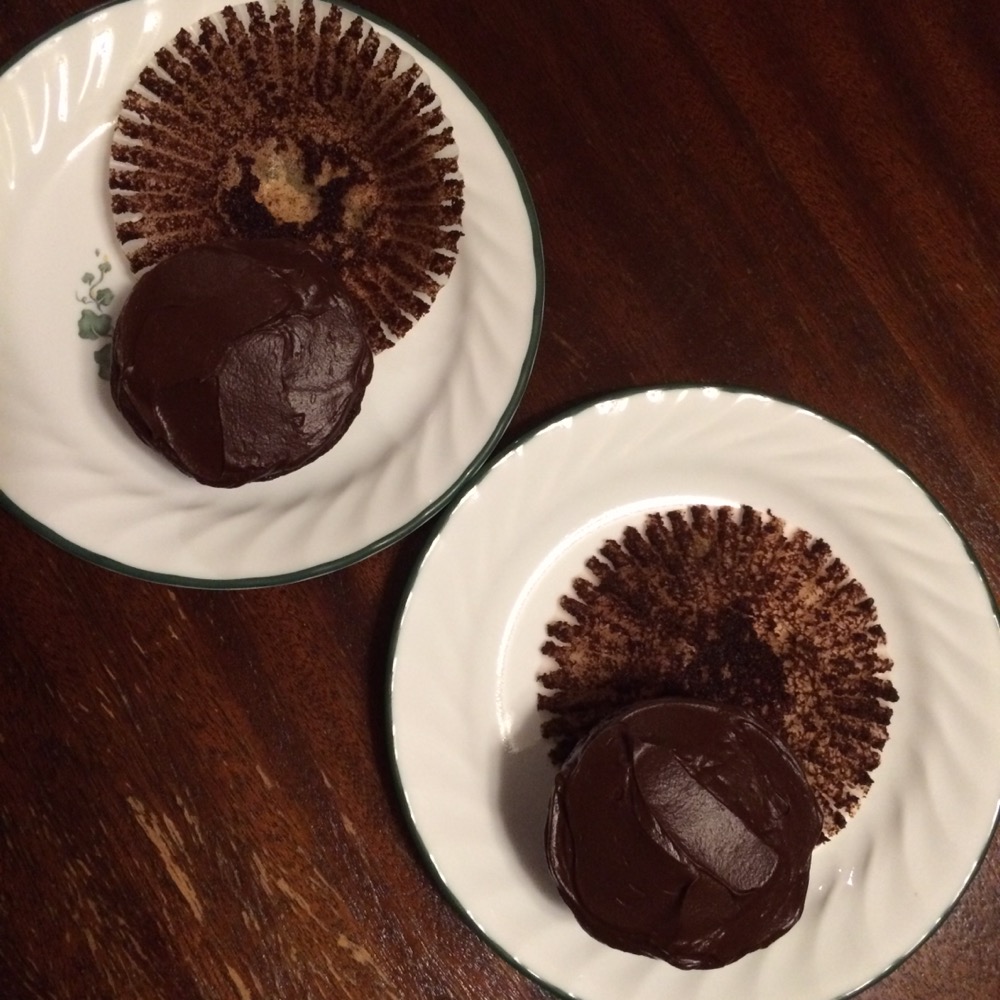
Maybe the sprayed wrapper stuck slightly less, especially the center bottom (upper left), but not a big difference.

You could do your own test with your recipe.  Or, just use the papers for cupcakes.  Don’t bother with spraying them.  You’re welcome.

P.S. Don’t bother with cute papers if you’re making chocolate cupcakes unless they’re some kind of fancy, heavy-duty papers with high opacity.  You won’t be able to see much of the design.

Cocoa-Hazelnut Spread

When asked if I liked, and wanted, hazelnuts, I said sure!  Hazelnuts are delicious, right?  It turns out I don’t actually like them by themselves but rather only in chocolate.  Oops.

I finally used some to make cocoa-hazelnut spread.  I based it on this recipe, but the recipe is British and required some translation.  It is delicious!  Just a little nibble makes a tasty snack.

Apparently, 200 g of hazelnuts is about 1 1/2 cups.

Peanuts are a type of groundnut, so I used peanut oil.  If you don’t have any peanut oil you can substitute other oil.  It doesn’t contribute to the flavo(u)r.  I think I used a little more than they called for to get it all to come together.

I assumed vanilla essence is either another name for, or similar to, vanilla extract.

Caster sugar is between granulated and powdered sugars.  The link suggests making it from granulated sugar in the food processor.  Since I needed the food processor for this recipe anyway I gave it a go, but I think it was too little sugar to work well.  Next time I would use honey.

As I typically do, I tried the recipe as-written the first time (or as close as I could get).  I tasted it and then doubled the cocoa powder.

My least favorite part was getting the skins off the roasted nuts.  It took way too long for such a simple recipe.  I wonder how much it affects the finished product to leave the skins on.


Overall, I like this recipe.  It is simple, tasty, and a good way to use up the hazelnuts in my possession.  The sugar was just a tiny bit gritty and this version was too sweet for sandwiches for my taste, but reasonably spreadable and not at all sticky.  Next time I will start unsweetened and add a little bit of honey at a time, to taste.

P.S. I bet this would make awesome truffles.

Homemade Play Dough

This is a simple, quick, cheap, and non-toxic (but not edible) play dough. It may be stored in an air-tight container for many months.

Homemade Play Dough Recipe:

  • 2 cups flour (cheap all-purpose white flour works best)
  • 2 cups water
  • 1 cup salt (basic cheap salt)
  • 2 Tbsp oil (canola or whatever)
  • 2 tsp cream of tartar
  • food coloring (or concentrated gel food coloring for colors like red or purple)

Mix ingredients in a big pot.  Stir over medium heat until it thickens and then comes together in a big ball.  Dump on counter and knead a bit until smooth.

Ideally your end user would observe or assist with the process as he is able.

Today’s play dough (pictured) had 20 drops green and 10 drops yellow food coloring.  Cooking time was less than 10 minutes and I barely had to knead it.

Just beginning to heat
Starting to thicken

Ready to remove from heat
finished play dough
Finished play dough

Black Raspberry Ice Cream

My husband loves black raspberry ice cream. This is how we made our own.

Preliminaries:

  1. Obtain black raspberry cuttings from a local friend.
  2. Leave cuttings out in the sun until almost dead, then plant the survivors. (This is known as “hardening” if you do it on purpose.)
  3. Allow plants to become established over several years until you get a decent crop of berries.
  4. When you see berries forming be sure to water plants well.
  5. Collect ripe berries daily before the birds get them.
  6. Freeze berries on a pan in the freezer, then transfer to ziplock bags. (We rinse & dry the berries first.)

Ingredients:*

  • 3 c black raspberries (makes 1 1/4 c puréed fruit)
  • 1 pint cream
  • 3/4 c sugar
  • 1 T lemon juice

Directions:*

  1. Purée raspberries (if frozen, let them melt at room temperature or in the fridge first).
  2. Blend all ingredients thoroughly in blender.
  3. Strain out seeds.
  4. Process for 25-30 minutes in ice cream maker (makes one batch in a 1.5 quart machine).
  5. Freeze overnight.

*Adapted from BlackberryRaspberry.com

The original recipe called for double the fruit, resulting in an icier product (and too much to be processed at one time in my ice cream maker). This version is still very flavorful but much creamier, having proportions more similar to our usual basic vanilla ice cream recipe.